To
access from outside your home, to your WebCAM, is necessary know the IP
of your Access Point that you use to connect to Internet.
Unfortunately, your home IP is
not a static IP but is a dynamic IP, this means that sometimes, your
Internet provider, change your IP.
Fundamentally is necessary an static IP, for get it there are two possibility that are:
1) Ask to your Internet provider a Static IP, but this is to expensive
2) Use a free DDNS service, in this tutorial we use: No-IP (www.noip.com).
The DDNS service, convert your dynamic IP in a static IP.
First step: register an account on a DDNS service.
There are a free DDNS services, we decided to use the No-IP service (www.noip.com).
After a registration on No-IP, you must see something like below.

If you press on: Modify
you must see something like below.
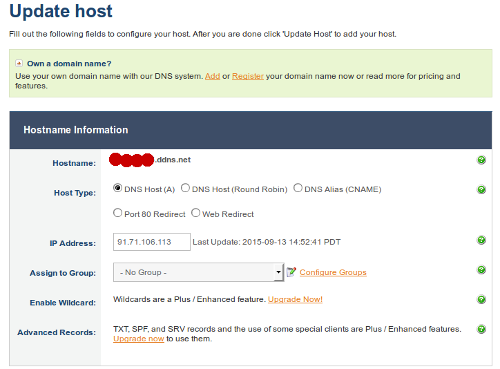
The: 
is the name that you choose for your No-IP hostname.
For example:
homecam.ddns.net
cam.ddns.net
etc.
Second step: It is necessary configure your CAMs with a static IP and tell them the No-IP account.
Suppose that your Access Point (your ADSL modem that you use to connect to Internet) have the IP: 192.168.1.1
a possible configuration of your CAM1 is shown below (the CAM that we use are Foscam mod. FI9818).
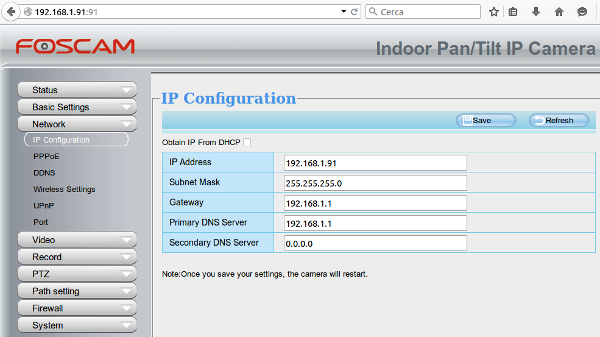
For configure a second CAM (CAM2), you must change the IP Address: 192.168.1.91 in 192.168.1.92 and so on for enumerate all the CAMs that you have.
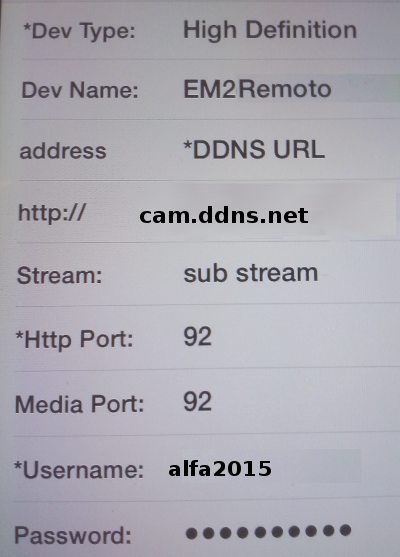
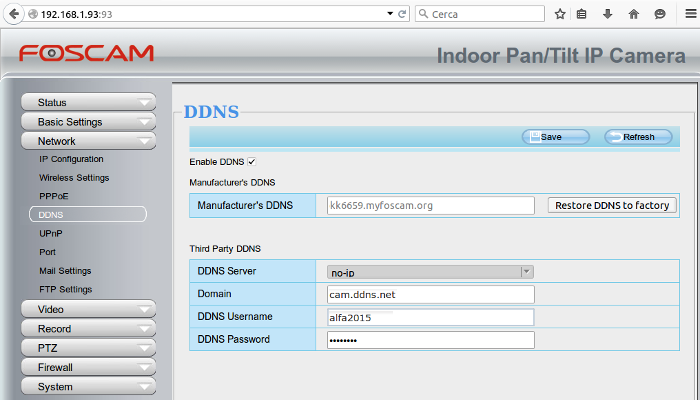
Now is necessary configure the DDNS of your CAMs, see the image below.
The Manufacturer's DDNS is the DDNS offered of your CAM.
Our Foscam DDNS is expired after one year from the registration.
Configure the: Third Party DDNS, in according to your registration on No-IP server.
Third step is configure your
Access Point (your ADSL modem that you use to connect to Internet) to
communicate to No-IP, the actual dynamic IP.
Actually, the 90% of the Access Point have a page dedicated to do this (DDNS).
We use the Vodafone Station 2 and the page is shown below.
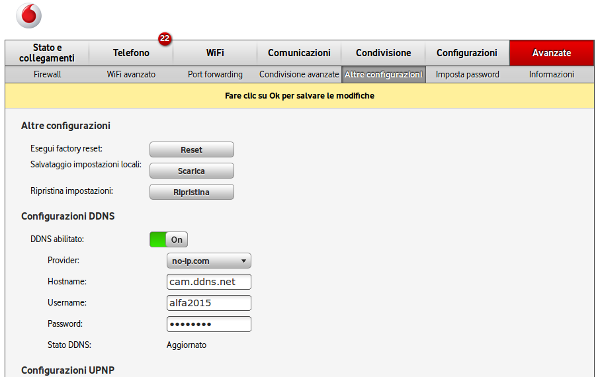
NOTE:
If your Access Point don't have a DDNS page, the No-IP offer a SW to install on your PC that do the same.
In this case the PC where you install this SW must be always ON.
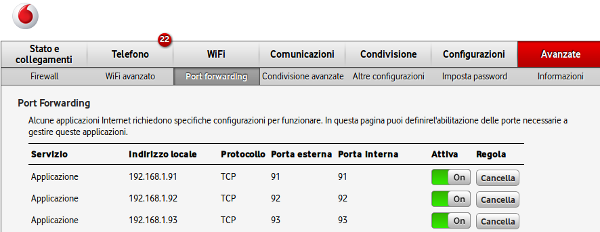
Now is necessary do a port forwarding for remote access to your WebCam (CAM).
On the Vodafone Station 2 the page for do this is shown below.